Select the Navigation Menu option from the Administration Menu:
The Navigation page will be displayed

The Navigation Menu page contains module menus that may only be altered in a few places and customisable menus. However, it is possible to move custom menus under any of the module menus. Currently only two levels are permitted.
Select the Navigation Menu option from the Administration Menu:
The Navigation page will be displayed
Select one of the following link to add, edit, delete or move custom menus. Refer to the Navigation Menu Features topic for information on the features.
To add a new custom menu:
Select the Add New Items button to insert a new navigation menu item at the bottom of the grid:
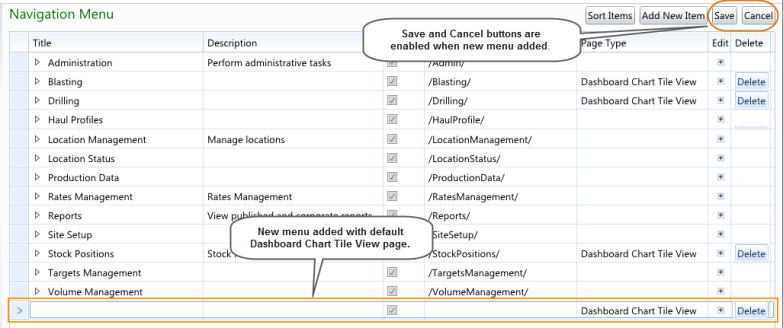
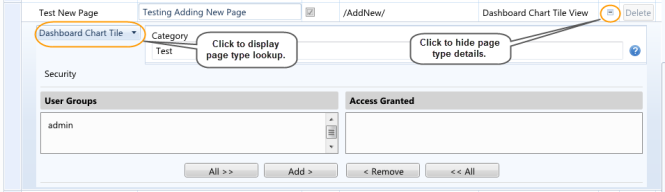
Select the Display button to display the page type details. As the default page type is Dashboard Chart Tile view a blank Category field will be displayed. Refer to the Page Types topic for information on the different page types.
![]()
Select the Page Type down arrow to expand the list of available page types.
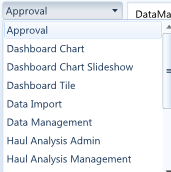
Select the required page type and enter values into the fields. Select the Help icon to obtain information about each page type field.
Select the Save button to save the navigation menu or Cancel button to reload menu items.
To edit an existing Navigation Menu:
Select the navigation menu to edit from the Navigation Menu grid:
Note: It is possible to change the Description and menu visibility for Module Menus, as well as grant user group access security.
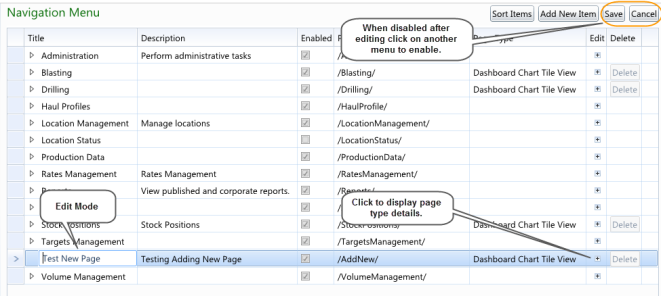
Select the Display button to display the page type details to make any changes to the page type fields. Refer to the Page Types topic for information on the different page types.
Select the Save button to save any changes made to the navigation menu or Cancel button to reload menu items.
To delete an existing Navigation Menu
Select the Delete button in the Delete column of the navigation menu grid to delete the menu
Note: You can only delete custom menus, which are the ones that have a Delete button in the Delete column.
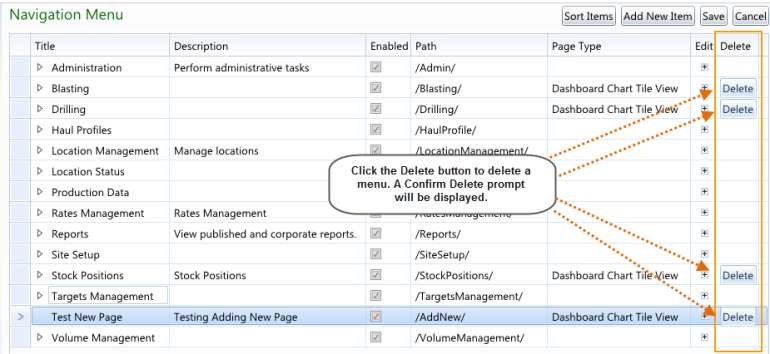
A Confirm Delete prompt will be displayed:
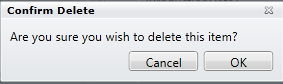
Select OK button to delete navigation menu or Cancel to abort deletion.
Note: The Navigation Menu page will be refreshed after selecting OK to confirm deletion.
When a custom menu is created it will be placed at the bottom of the Navigation Menu grid as a parent level menu item, until it is saved or moved.

Drag and drop the custom menu item onto the parent level menu item that it is to appear as a child level menu item. A guiding line appears as you move the custom menu item indicating the parent level item that the custom menu item will be placed under.


Drag the custom menu item onto itself until a right arrow appears, then drop to become a parent level item.
Missing values for a custom menu item are validated when you click off the newly created custom menu.
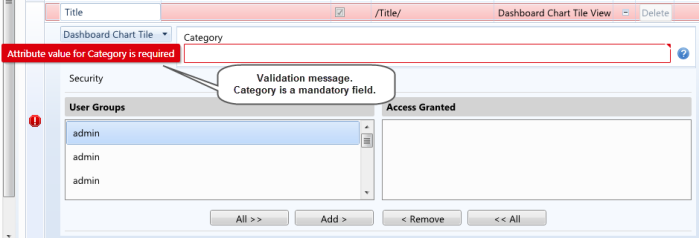
The background colour for the new custom menu line will be changed from blue to pink and an exclamation stop sign will be displayed in the far left column. Clicking in an empty mandatory field will display a validation message.
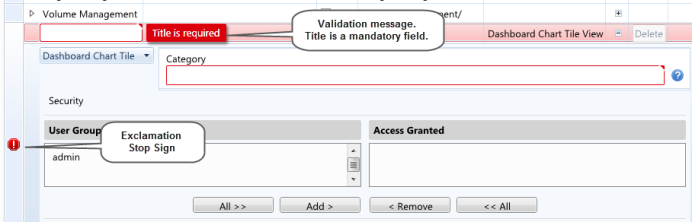
Mandatory page type fields that do not contain a value have a red border placed around them. Clicking in an empty mandatory field will display a validation message.
When the below occurs on the navigation menu you will need to select the Display button to display the page type details to find out where the validation error is occurring.

Note: Selecting the Esc key will cancel editing of the cell with the validation error and selecting the Esc key twice will cancel editing of the row.